
At the core of the Yarn Club, of course, is the yarn. It's what brings everyone together every month, that fibre love - the possibility in each new skein, the discovery of a different blend, the seduction of colour. I thought it only fitting that we make sure our deep appreciation of yarn is supported by a deeper understanding of it.
Therefore, this month, we are going to totally geek out.
Anatomy of a Yarn - why it matters
It wasn't until I began spinning my own yarn that I really started thinking about this at all. I still remember the lightbulb coming on over my head the first time my spinning teacher (at the now-closed Vancouver location of Birkeland Bros) explained plying to me. I also remember being mystified when Cara Birkeland handed me a bag of sliver to go with my shiny new Ashford Traveller and told me in a reverent voice, "it's T-29 sliver." I knew I should be impressed, but I didn't know why.
Now that I do know, I look at yarn with a completely different eye, and approach my projects differently as well. As a result, my projects are more successful in general. Knowing the yarn down to its basic building blocks is invaluable when you are ushering it through its next metamorphosis - taking it from yarn to finished object. So, on with the breakdown.
Fibre
First, and most obviously, the fibre content. Most yarn-crafters have some intuition about this these days. It figures largely in how we spend our yarn-dollars. Is it worth the extra splurge for that 15% silk? How much difference is the 5% cashmere actually going to make to the knitting experience? Alpaca, llama, camel, angora, mohair, merino, blue-faced leicester, bombyx silk, tussah silk, cotton, linen, hemp, rayon, acrylic, Tencel, SeaCell - and those are just off the top of my head; there are as many fibres and fibre combinations as there are knitters, crocheters, and weavers to have preferences. (T-29, in case you're wondering, is a blend of Perendale and Southdown sheep's wool.) Far too many to tackle in one blog post. We're going to come back to these individually in future months - each fibre deserves its own consideration. For the time being, we'll lump them into categories:
- Protein - animal fibres, including fleece, fur and silk. With the exception of the latter, they are characterized by the presence of scales (this always makes me think of the Pert Plus commercials from the 90s, and those cheesy hair-smoothing graphics). The scales help the fibres to grip each other when adding twist (for yarn) or friction (for felt) (again, with the exception of silk). Here's a brief rundown of the steps involved in turning sheep's wool into yarn.
- Cellulose - plant fibres, including cotton, hemp, and linen. These fibres do not have scales, and lack the elasticity of animal fleece. They are lightweight, and do not trap still air like protein fibres, so are much cooler. Here is a walk through of industrial cotton processing from the plant to final product.
- Cellulosic - these are fibres derived from plant fibres by chemical means, including rayon, modal, acetate, and viscose. Generally they have been reduced to a liquid state and extruded through a spinneret to reform into fibres. Read about the process of creating rayon in more detail here.
- Synthetic - these are completely artificial fibres created only by chemical means, including acrylic, nylon and polyester. Here's how to make nylon at home if you're feeling adventurous.
Spinning Methods: Worsted vs. Woolen
For the most part, hand-knitting yarns are spun in a way that is known as "worsted," not to be confused with "worsted weight" yarn. When we're talking worsted spun yarn, we're talking about fibre orientation, not yarn weight at all. When yarn is spun worsted, the fibres are neatly aligned before twist is added. This gives a strong, neat yarn with good definition and higher shine because most of the fibre ends are neatly tucked away within the yarn. This is the method used for spinning most fibres (in fact, I don't believe there are any instances of cellulose, cellulosic or synthetic fibres being spun any other way, at least commercially).
The alternative method is "woolen" spinning, used (as the name would suggest, and as far as I know) exclusively to spin protein fibres such as wool. The key difference in woolen spun yarns is the alignment of the fibres - here they are not neatly lined up, but spun from fibre that is intentionally disordered. In handspinning, woolens are often achieved by spinning "from the fold," wherein the prepared fibre is folded over to create this disorder. The resulting yarn is loftier, warmer (because the disordered fibres trap more still air), and fuzzier (because there are more loose fibre ends sticking out).
Here is a video where Clara Parkes explains the difference between worsted and woolen in more detail.
Twist: S or Z?
Now let's focus on twist for a moment, because this simple component of yarn can be a real "Aha!" moment for yarn fans.
When we talk about yarns being "spun" it's in reference to the addition of twist to the fibres. As with anything that spins - wheels, tops, planets - there are two basic directions: backwards/forwards, or clockwise/counterclockwise. In yarn, these two different twist directions show up in the finished yarn in distinct ways that have led to their being referred to as "S-twist" or "Z-twist."
Looking through your stash, the final twist you'll see in most of your commercially produced plied yarns will be an S-twist: that is to say, the visible line that the twist creates in the plies of the yarn will follow the direction of the middle bar of an S, like this \. S-twist is created by spinning the yarn counter-clockwise.
The opposite twist is referred to as Z-twist for that same middle bar reason. The twist follows the direction of the middle bar of a Z, like this /. The Z-twist is created by spinning the yarn clockwise. Commercially, the only place you are likely to find a visible Z-twist is in a single-ply yarn, or in a cabled yarn. The reason for this is the plying process, which we'll get to shortly.
The direction of the twist has a direct effect on the fabric created from a given yarn. For example:

This is Patons Classic Wool Worsted, a basic 3-ply yarn, with a final S-twist. Look closely at the stitches: although they are very even at first glance, the two sides of each column of stitches is not identical. On the right side of the stitch, the angle is a bit more acute, and the stitch is more distinct from the one below and above. On the left side, the stitches seem to almost twist into an continuous column. This effect is even more pronounced in a higher-twist yarn. In a Z-twist yarn the effect is reversed, with the stitch distinction being highest on the left side of the column, and the continuity becoming apparent on the right.
Plying
Discussing twist is almost impossible, and basically useless, without also talking about plies. Above, where I mentioned the "final" twist of the yarn, this is in reference to there being more than one twist involved in a plied yarn. The first twist given to the fibres, to make them hold together, and create a single ply (or "singles" used as a singular noun, to add to your confusion), is made in the Z direction. If a yarn is to be marketed as a single-ply, it is left like this. However, twisting the yarn in one direction adds energy to the fibre that needs to be carefully balanced. You may notice working with a single ply yarn that the fabric wants to bias and not lie straight. This is because the yarn is unbalanced. You can balance that energy by adding a second Z-twist single ply, and twisting the two together in the opposite direction - that is to say S-twist - and end up with a nicely balanced 2-ply yarn that won't twist back on itself or distort the fabric.
This same principle is applied to 3-ply, 4-ply, 5... and so on. Michele Lock discussed twist and plying techniques at length for Knitty.com in 2005, you can read her excellent column here. I found her discussion of cabled vs. "faux" cabled yarns particularly interesting. There is also a useful post on the Craftsy blog about the possibilities in structuring handspun yarns.
Another thing to note about plies is that odd numbers (3-ply, 5-ply etc) make for rounder, more-stable yarns. A 2-ply actually makes for an oval shape, if you were to look at it in cross-section, and as a result you will lose stitch definition. A 4-ply can sometimes end up looking like it has an extra forlorn ply sticking out of your stitches, a little loosey-goosey.
A note on yarn weight
As much as the efforts of the CYCA to standardize yarn weights is admirable, unless every yarn company adopts the standards, they're not particularly useful. More to the point, wouldn't that be boring? If every fingering weight yarn were exactly the same width as every other fingering weight yarn in the world? Yes, it makes matching yarns to patterns challenging at times, but isn't that part of the thrill of the chase? And isn't that endless variety, that true uniqueness of every individual yarn, part of what makes us fall in love with fibre to begin with? I believe so, and if you share that belief, you need to accept that, as with clothing sizes, a "worsted" from one brand will not fit you the same way as a "worsted" from another.
Let the swatch be your dressing room
Swatch, swatch, SWATCH. Learn to love the swatch. There is no one I know who loves a swatch more than Clara Parkes. Read her Swatcher's Manifesto here.
The swatch will tell you everything you need to know about how the anatomy of a given yarn will come to play in the end project. And the above information, the information at the end of the various links, will also tell you WHY a yarn is behaving the way it does when swatched (and how to correct for it, pick a different stitch, or a different yarn).
WPI: a precursor to the swatch
Finally, I want to put in a good word for wraps-per-inch.
This is a technique widely used by handspinners as a weight gauge, but it's gaining speed with yarn-lovers in general. Because yarn weights vary wildly, despite what's printed on the ball band, a yarn's wraps-per-inch can give you a little more insight into how it will make up, before you actually start your swatch (because you're going to swatch, right??). Here's how to calculate it. You can also get yourself a handy WPI tool, like this one from Katrinkles.
Further reading
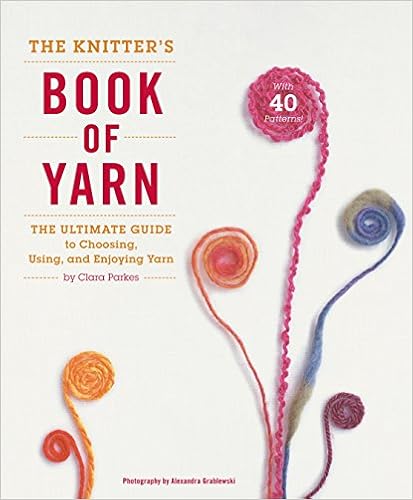
Okay! Now you need to go and do a little processing yourself, don't you? If you're still with me, and want more, Clara Parkes, of the wonderful Knitter's Review, has written many equally wonderful books, including The Knitter's Book of Yarn, and The Knitter's Book of Wool.