This month we had a skill-sharing session at Yarn Club and added a few new tricks to our knitting bags. Here I've rounded up the best tutorials I could find for the cast-ons and bind-offs we discussed, and links to the books I referenced. In the fullness of time, I will add my own video clips demonstrating the techniques that were more difficult to find online.
First off, there are two really fantastic books that cover this topic:

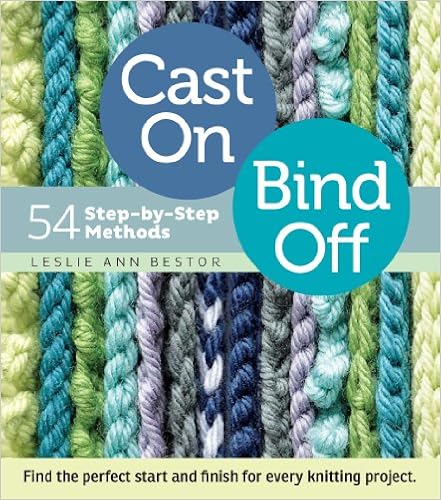
Cast On Bind, Bind Off: 54 Step-by-Step Methods by Leslie Ann Bestor
Leslie Ann Bestor's book arranges things by function - i.e. stretchy, decorative, etc. The advantage to this book is that the techniques are depicted in photographs rather than illustrations, which I personally find a bit easier to interpret.

Cast On, Bind Off: 211 Ways to Begin and End Your Knitting by Cap Sease
I know, right? TWO-HUNDRED AND ELEVEN. Cap Sease doesn't mess around. Most delightfully, there is a cast-on in here called the "Japanese Waitress" that a friend of Ms. Sease apparently learned in a restaurant in Japan from her waitress.
The book is arranged mostly by technique, so for example, all the loop cast-ons are grouped together. The only detraction I found using this book was that there was sometimes a bit of a lag while my brain translated the technique illustrations into reality.
The Cast-Ons
Let's take a look at the usual suspects:

The Knitted Cast On is the one I most frequently teach to beginners. It gives them extra practice with their knit stitch, and doesn't confuse them with another movement to memorize before they're ready. Also it's easy to work the first row because it's a very stable edge. Beyond that however, I don't use it overly often unless I'm casting on an edge that I know I want to pick up and knit from later - the cast-on stitches are loose and are easy to pick up since you can see which stitch belongs to which column at a glance. Knitty has a photo tutorial covering the Knitted, Cable and Long-Tail Cast Ons that is very straightforward. I also found a Knitted Cast On video tutorial from Knitty.

The Cable Cast On, that old standby, is a favourite of mine for straight edges. I don't love it for ribbing because it can make the rib flare out. It's not stretchy. Otherwise, you can't beat it for a nice, clean, sturdy edge. Plus it's just a skip away from the Knitted Cast On, if that's where you started your cast-on journey. The tutorial is again from Knitty. Scroll down to the second set of instructions.

The Long-Tail Cast On. What can I say about this one? I never understand its popularity. In my repertoire, it has only one redeeming use, which I will get to shortly. Why bother with measuring out that long tail? The edge is not even that pretty. Some day someone is going to explain to me why it's awesome. Until then I will just puzzle over why soooo many people use this as their go-to cast on (I suspect it may be because for a long time they didn't know another way...). The tutorial is also from Knitty, the last on the page of 3.
Now for my personal fave...

The Double-Twist Loop Cast On is my go-to method. When I start my tutorial clips, this is the one I will do first, because it's not very well covered online, and is even maligned in places. The tutorial is from the great blog over at Cotton & Cloud and is the second cast on discussed in the post. There are tons of different loop cast-ons, this one just happens to be the one I was taught and got stuck in my head. Once you learn a loop method, you won't find a faster way to throw a row of stitches onto your needles, and that is probably why I love it. The caveat is that the first row is difficult to keep neat because the loops can stretch an unbelievable amount between stitches. Keep your needles tight together for that first row, and you won't be disappointed. It's an attractive and very stretchy edge, plus it lets you cast-on in a flash!

I can't find a great tutorial for a two-colour long-tail cast on, so that's next on my list of DIY tutorials. Basically, you follow the Long-Tail method, as discussed above, but instead of making a slip-knot after a long tail of yarn, you make a slip-knot tying two colours of yarn together. You then take up the two yarns in the slingshot position - one over your index finger, the other over your thumb. If you leave the yarns where they are, you'll have a cast-on with one colour for the stitches, and one colour for the bottom edge, but if you alternate the colours by twisting one way or another and setting the slingshot the opposite way, you get different effects. Above, I twisted the yarns counter clockwise between each stitch, giving me alternating-coloured stitches, and the braided edge effect. This is a great option for corrugated rib, and almost the only time I ever use the Long-Tail method.

The I-Cord Cast On is one I particularly love. It's such a polished detail on an edge. Definitely Rock Star knitting. There are a couple of ways to do it, but I like the one laid out by New Stitch a Day the best. Once you've worked through doing it a couple of times you can decide if you'd be most comfortable sticking with the two needle method, or working with one straight and two DPNs.

I learned Judy's Magic Cast On while making knitted sushi, if you can believe it. Judy Becker developed her cast-on method for toe-up socks, but it can have any number of applications (socks, mittens, stuffed animals...). Above, I cast on and knit two-sided for a few rows before knitting the opposing stitches together to make a rolled edge - not unlike a tubular cast-on. Of all the seamless cast-ons for knitting in the round, Judy's is by far the neatest. The tutorial is from Knitty and written by Judy herself.
The Bind Offs
For a long, long time, I only knew the Standard Bind Off, and it served me well, until I made my first pair of toe-up socks. This is probably a familiar story for a lot of people. So let's start here:

The Standard Bind Off - isn't it interesting that there is a bind-off technique so universal it has earned the "Standard" title? Conversely, cast-ons haven't been nearly so lucky (I blame the Long-Tail... because everyone who learns it first says to themselves "Really? There has to be something better than this."). This is a good workhorse technique. It's solid, but not fancy, and not always the best tool for the job. The tutorial is from Knitty and the Standard is the first technique discussed.

When you find the Standard method has reached the end of its usefulness, the first thing you're probably looking for is something with stretch. Jeny's Surprisingly Stretchy Bind Off is my favourite stretchy ending, particularly for socks. It's easy to remember and you can execute it without props (no tapestry needles here!). Plus it's really stretchy, as advertised. The tutorial is from Knitty - yes, I always go there first.

The Standard Bind Off is a jumping off point for a lot of other Bind Off methods, including this one: the Decrease Bind Off. It is the second method discussed in the Knitty tutorial. As I write this, the Standard variations make more and more sense in my head - because you're dealing with stitches that need to be tied off, rather than yarn that needs to be wrapped, it stands to reason there would be fewer bind-offs than cast-ons. The Decrease Bind Off gives a little more flexibility to work with, though for my taste not quite enough for the top of a sock, for example.

The One-Over-Two Bind Off has an obvious drawback on stockinette stitch, as you can see above. It draws in quite a bit, and there's no way you're blocking that out. Unless you want a cinched-in effect, it's probably not going to be one you use for stockinette. But cables - ah! When used over a stitch pattern that is already doing some cinching of its own this helpful little trick will help the ends of your cables from flaring out. The tutorial is from New Stitch a Day.

Here's the good-old Standard method again, dressed up in two different colours. The trick to getting the colours to line up so nicely is to knit each stitch with its opposite colour as you go. That way, you don't have the red stitch leaning over the white column, and so on. Don't you look smart!

Just as there are many Tubular Cast On techniques, there are a similar number of Tubular Bind Offs. Once again, I'm going with the option that involves the least amount of fuss. The tutorial I found lists this as "Alternating Sewn Bind Off", and it involves slipping the knit stitches to one needle, the purl stitches to another and then using Kitchener stitch to graft the stitches together. The result is a nice invisible bind-off edge, with a good amount of stretch.

The Icelandic Bind Off is another variation on the Standard Bind Off that gives a bit of a rolled purl effect. Here, the first stitch is pulled over the second before the second stitch is knit. The tutorial is from Very Pink, a site well worth checking out further for its many clear instructional videos.

Last but not least, the I-Cord Bind Off, which of course matches the I-Cord Cast On discussed above. Where would the knitting world be without i-cord? I shudder to even speculate. The Knitty article already referenced shows this bind-off at the bottom of the page. It's worth noting that you could use this technique to create an I-Cord edge along a row of picked up stitches as well - such as a cardigan front edge. Above, I've used it to create a piped edge in a contrasting colour.
That's it for now! Thanks so much to all who came to the Club meeting on Thursday. Please feel free to contact me with any comments or questions. See you next time!
